
Altered State

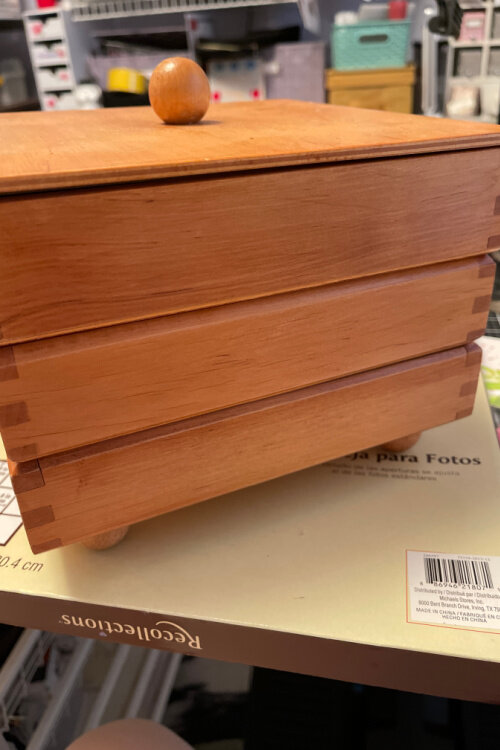
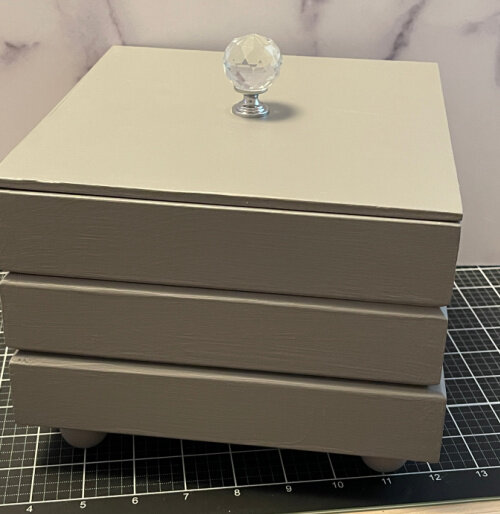
I’m still working toward my Educator Certification, and you’ll see two posts with final projects. The first is to alter something. I’ve had a plain wood storage box for years. As I was looking around for a project to alter, I thought it would be the perfect thing!
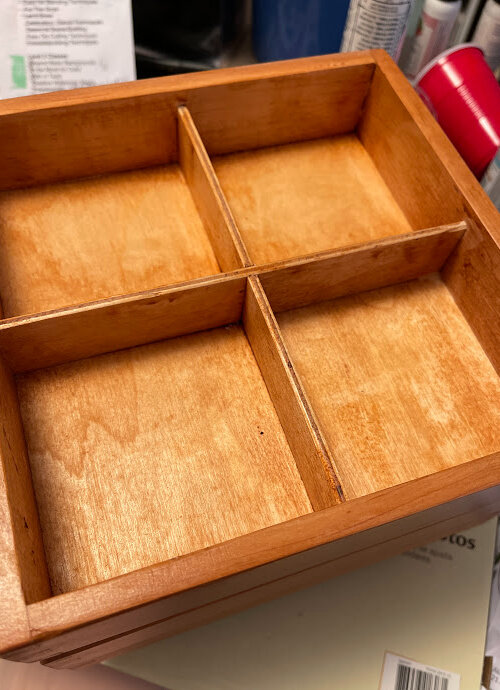
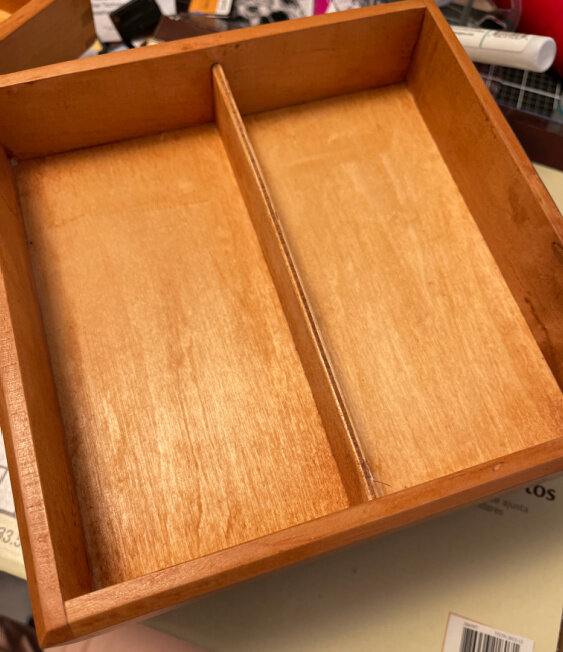
As you can see, there’s a lid and 3 layers. Each layer has a different number of sections, so there was a lot of real estate to paint and decorate.
I had some leftover grey chalk paint and thought it would be the perfect background for my decorations.

With that finished, I started decorating it all. I envisioned using the Trellis Stencil and Embossing Paste for the box lid, so that’s exactly what I did! I added flowers from the Watercolor Wonders set (Classes: Stamp Layering 1, Celebrate: Stencil Techniques), and a tag with an idea of the theme of the box.


I decided to decorate each layer differently and for the first level, each square in each layer differently. I needed to have the decorations be in scale with the size of the section, and I wanted each of the layers to be decorated in a cohesive way. I decided that affirmations and flowers would be the items that would be the theme between the layers. I grabbed both of the Better Together stamp sets, because I love the messages, and thought they would be perfect for my plan.
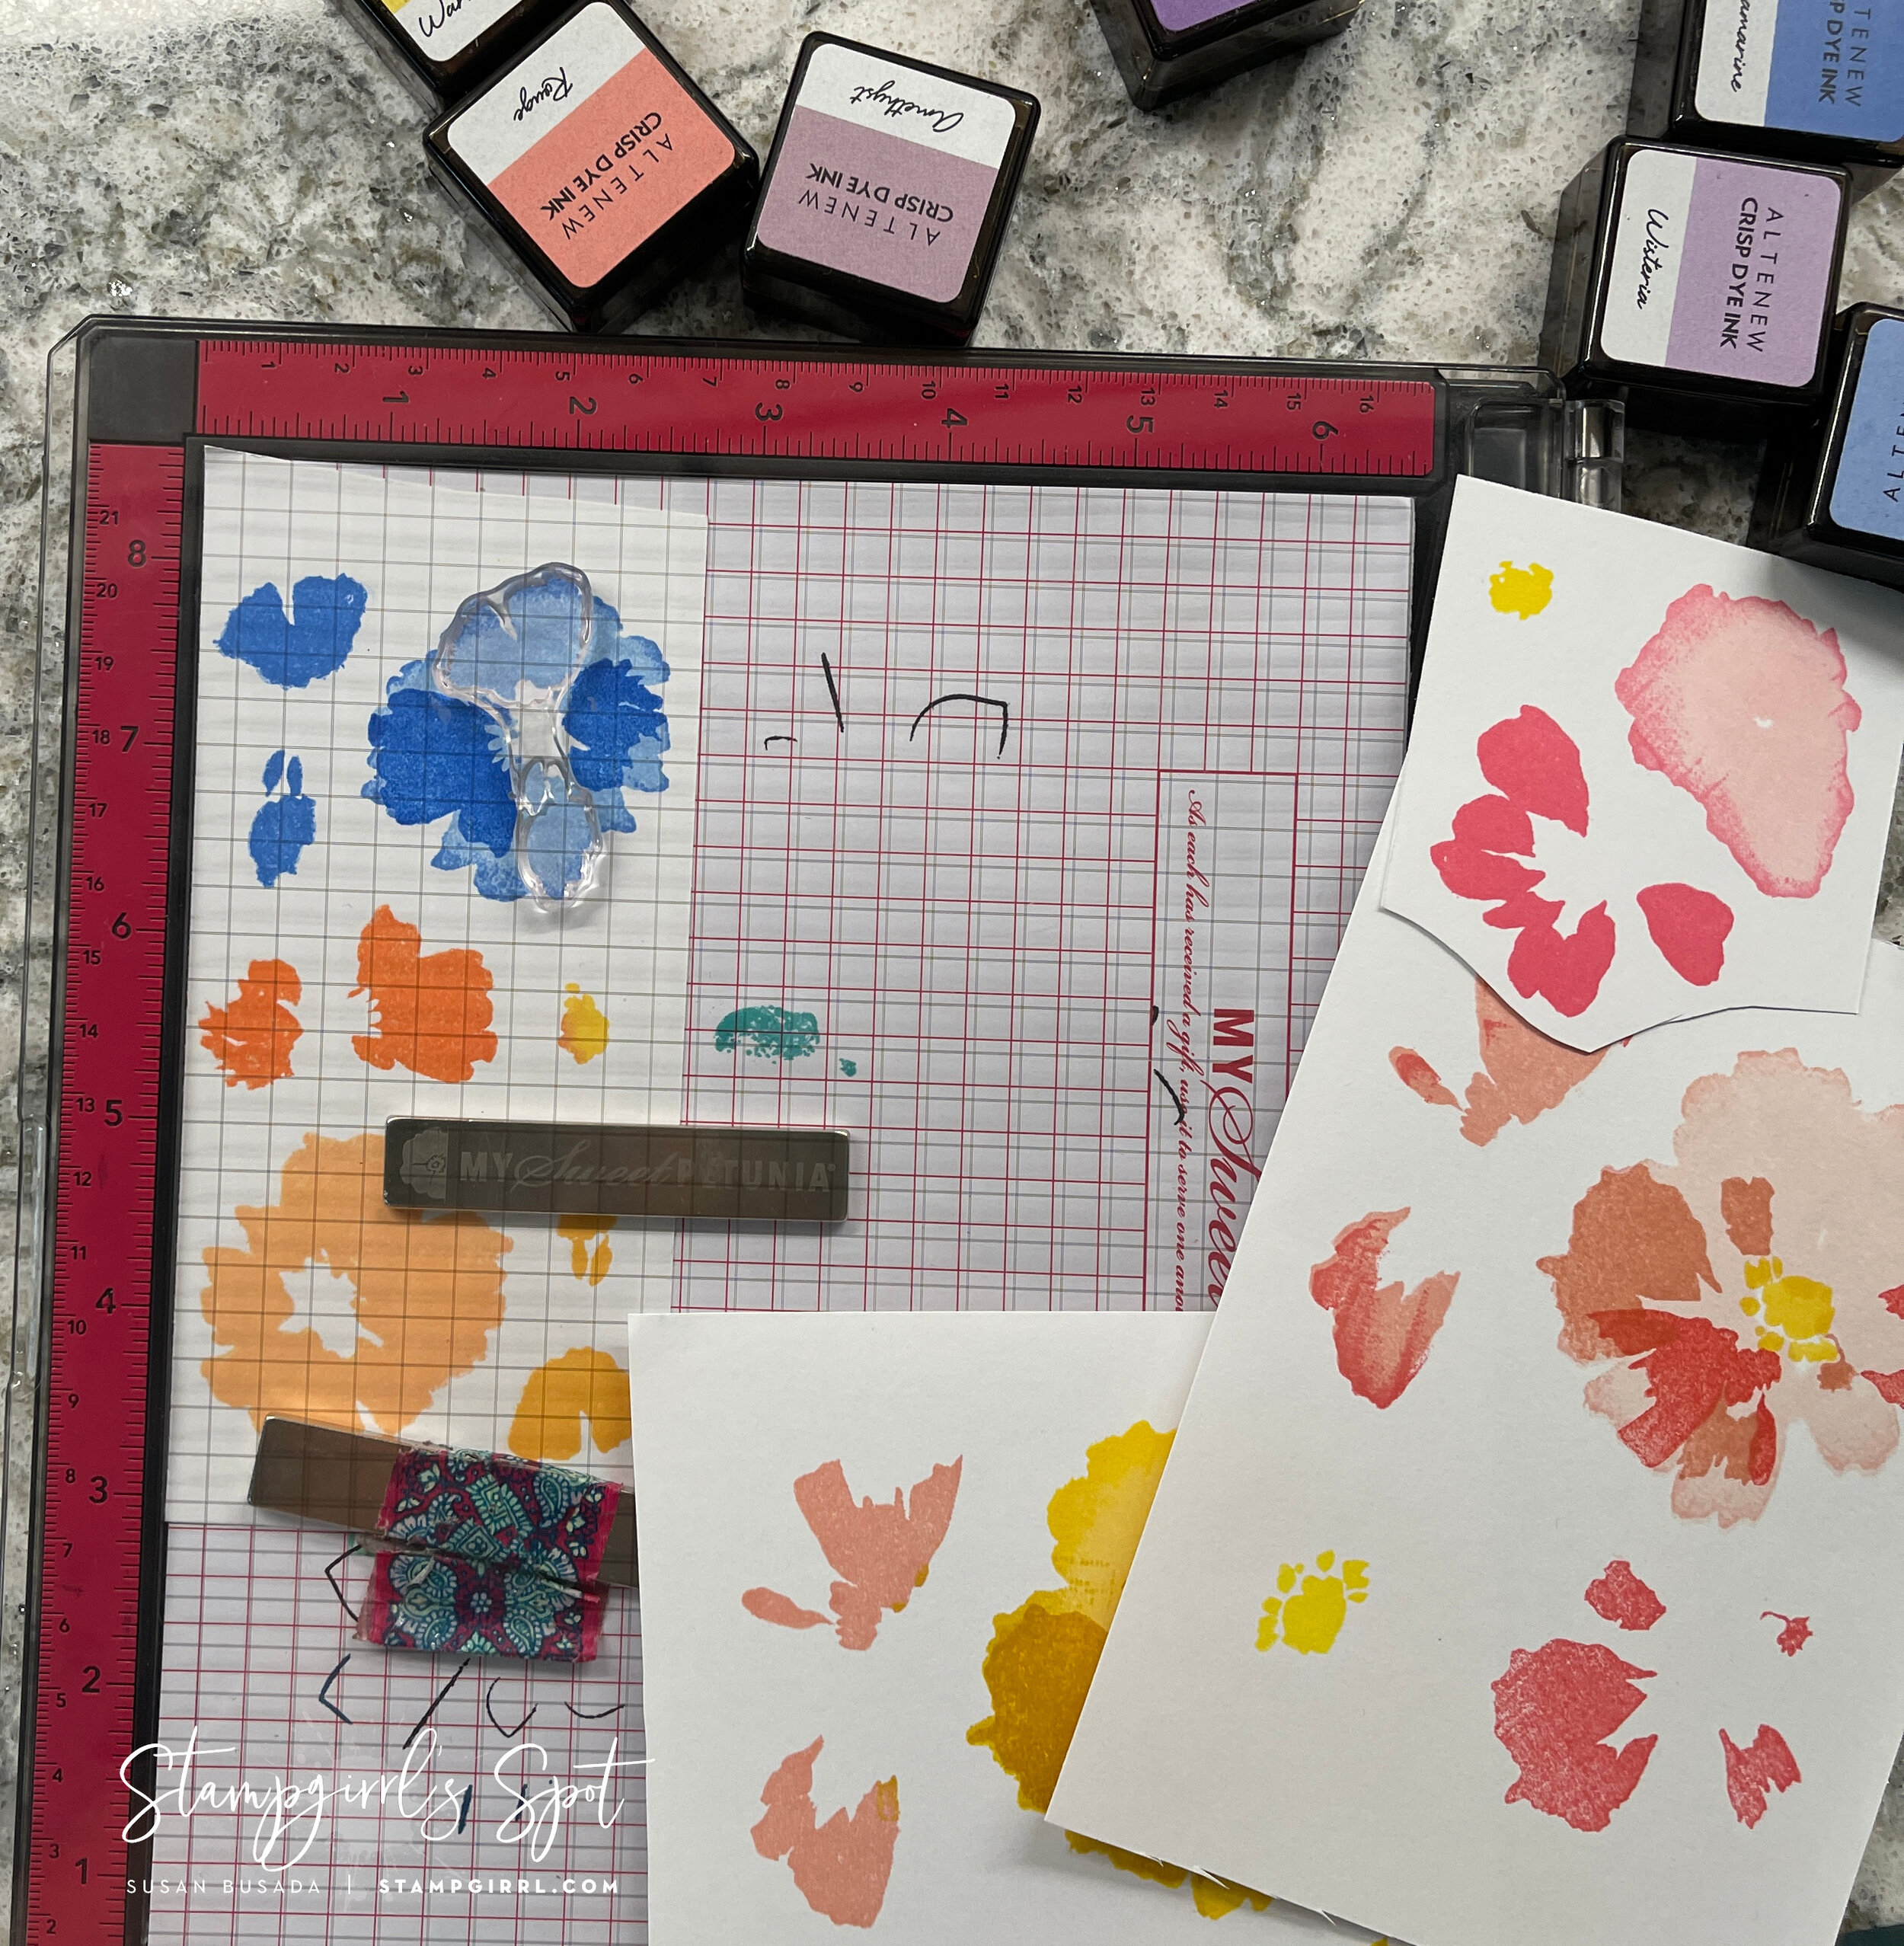
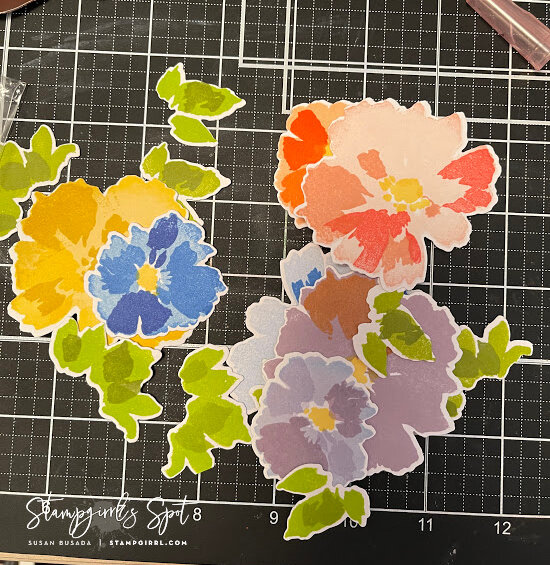
The top layer has 4 sections, and I wanted to do something similar, yet different, in each section. I went to one of the first Altenew sets I bought, Painted Flowers. I used 3 colors for the flowers and used my Mini Blossom die-cutting machine to cut them out. I love having a pile of cut flowers to play with!

I decided to make my own affirmations since the squares were so small. I wanted the words to stand out, so I used the Mega Brush Alpha set. Stamping one word on each square sounded like a good idea, and thought it would be fun to tie them together in some way. I started with “be”, then three things I thought everyone should “be”: kind, calm, and you. To help the eye connect and travel around the squares, I used three colors of the flowers on “be”, then a different combination of colors on each square. I used Nuvo Drops to embellish and visually connect the squares. (Class: Polychromatic)

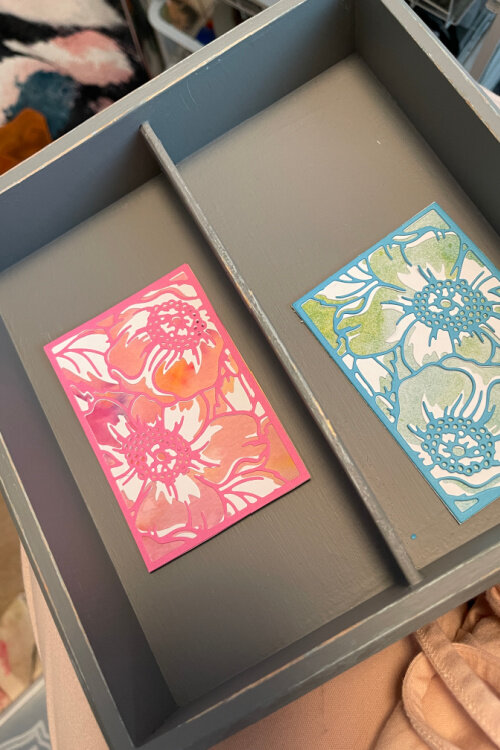
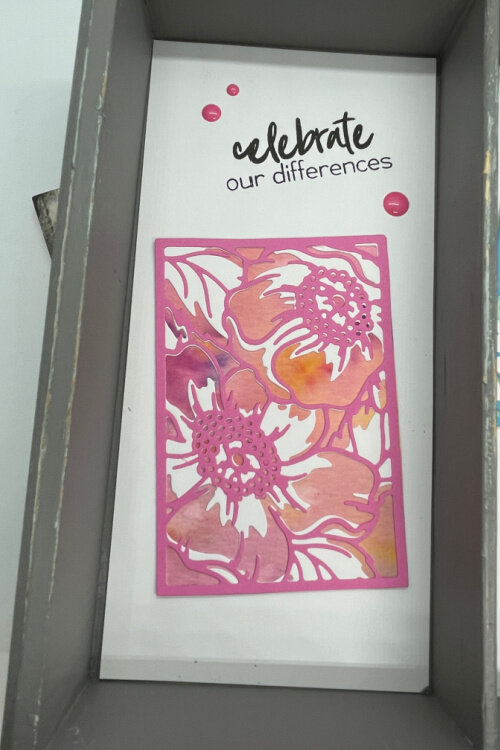
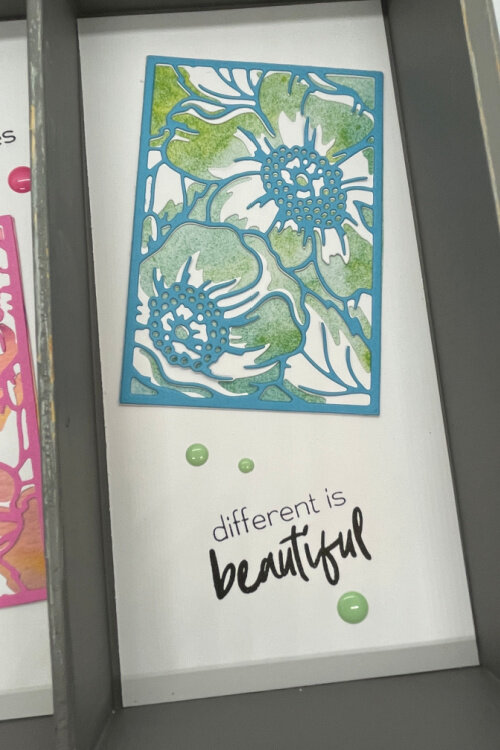
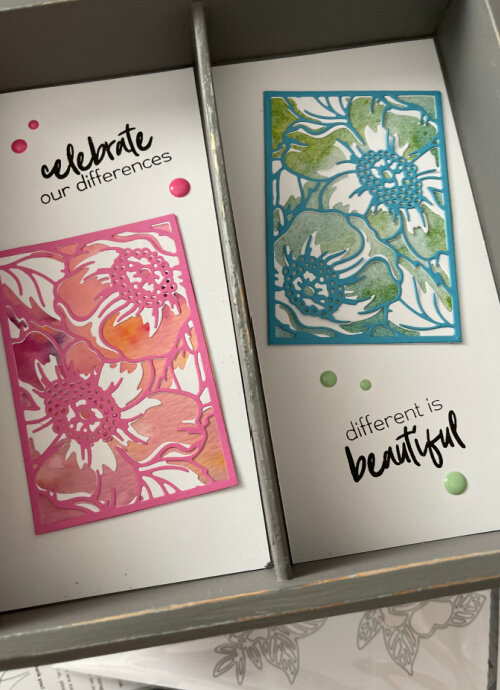
I had more area to work with on the second layer, so I used a larger focal point. I’ve always loved the Dog Rose Dies, I thought it would be fun to use them with a patterned paper for one of the layers. I got my trusty little die cutter and got to it! Since the images were so detailed, I attached Adhesive Sheets to the back of each sheet before die-cutting the images. It made everything go together so easily! I picked two similar sayings for each of the panels and coordinating enamel dots around the words helped make the panels look a little more finished. (Class: In the Mood for Color, Easy Die-Cutting Techniques)

I used one of my favorite new techniques for the final layer - alcohol ink on vellum! I didn’t take process photos (shoot!) but I can explain it! I started by cutting vellum into 3” strips, then using Alcohol Markers, colored (more like scribbled) on one side, each strip with a different color from the Red Sunset Marker set. Then spritzed each strip with alcohol to move around the ink., and add some interest and texture. I did the same with the Green Fields set to create the leaves. Once everything was dry, I cut a different layer from the Antique Rose 3D die set from a different color vellum strip.


I used my favorite saying for this layer, but it looked a little bare even with the roses, so I decided to frame it in silver metallic paper, to bring attention to the saying, but also to ground it a little. Roses around the frame, soften the edges of the frame, and the placement of them at each corner moves the eye around the page. (Class: Magic Marker Techniques)


This was time-consuming, but oh so gratifying! Now I have to display it, but that would mean I would have to take it out of the bubble wrap it’s stored in! I’m so afraid I’ll hurt it!
Thanks for following me on this journey, a special thanks if you stuck around to read the whole post. Look for the second part of the Level 2 final project - coming soon!
In the meantime, take care and be kind,
XO
Sue