
Cards That Move

I’ve always been intrigued by moving cards. When I had the opportunity to choose 5 classes for my Level 3 training, I jumped at the chance to take this class! I’ve never used the Crafty Life stamp set either, so I figured I’d do both at once!
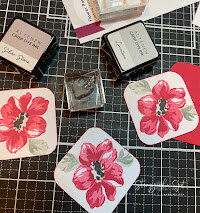
The outside of the card was the easy part - the inside is where the magic happens. I decided that a plain front wasn’t a good look, so I used the large stamp from the Pinstripe stamp set and Pure Graphite Ink, to create thin stripes on the card front. I used one of the sayings from the Crafty Life set and Obsidian Pigment Ink for the greeting. Then that looked a little too plain, so I made a mask for the greeting (and forgot to take a photo of it), and used Ruby Red and Coral Berry Crisp Dye Ink to stamp a flower from the Flower Power stamp set next to the greeting. With that finished, I started on the really tough part, the inside!

These have been called “explosion cards”, I call them pretty cool. Because they do this:
It may not look like much now, but keep reading!
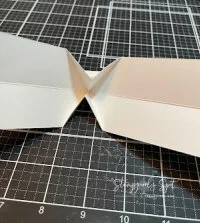
It starts with a strip of 2.5” x 8.5” paper folded in half in both directions. There’s some fancy folding on the diagonal, and it ends up like this:
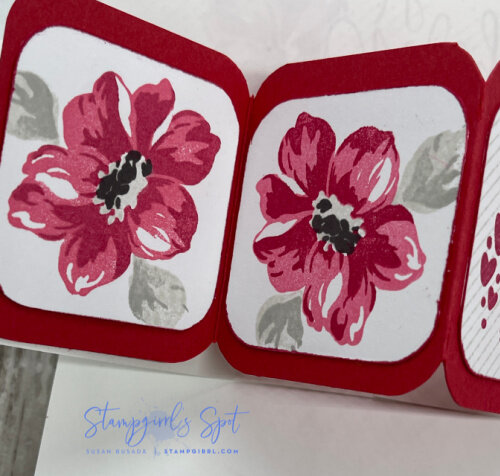
The trick is to cover this mechanism with something pretty, so I set out to do that. I used a piece of red paper to match the Ruby Red ink. This paper was cut the same size as the first strip - 2.5” x 8.5” - scored and folded into fourths, then attached to the folded white strip. I cut smaller 2-inch squares to cover each folded area, and decorated 3 of them with the same flower in the red colors as I used for the card front, and added some grey leaves in Limestone and Silver Stone Crisp Dye Inks as some filler, and to bring in the color I used on the Pinstripes stamp. On one of the squares, I used more elements from the Crafty Life set, two friendship hashtags, and an envelope with a heart. I thought it looked a little plain, so I went back to the Pinstripe stamp to add some texture to that square.
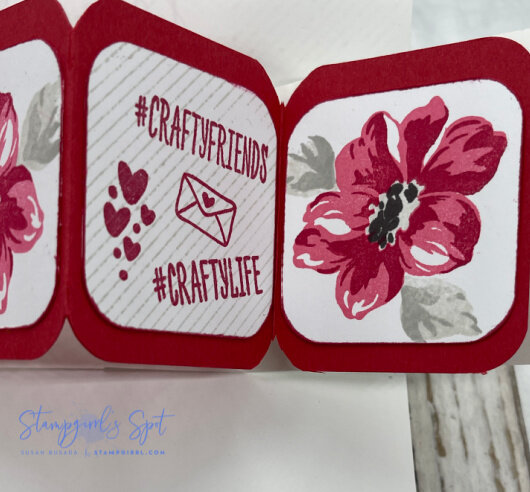
And once you’ve put it all together, this happens:
What I didn’t tell you is that it took me 3 tries and lots of wasted paper to get to this point, but I couldn’t be happier about it!

Now that I’ve made one explosion card, I want to make a bunch of them! They’re a lot of work, but there’s a lot of payoff!
I enjoyed sharing this with you, and sharing my first ever videos! I hope you enjoyed it!
Until next time, take care, and be kind.
XO,
Sue