
Challenge part 2 Masculine Cards

The second part of the Challenge is making 4 masculine cards for specific occasions: Love, Thank You, Encouragement, and Birthday. I decided to challenge myself further and use the same stamp and die set for the cards: Leaf Canopy, and limit the colors to predominately green and blue.
So let’s get to it!

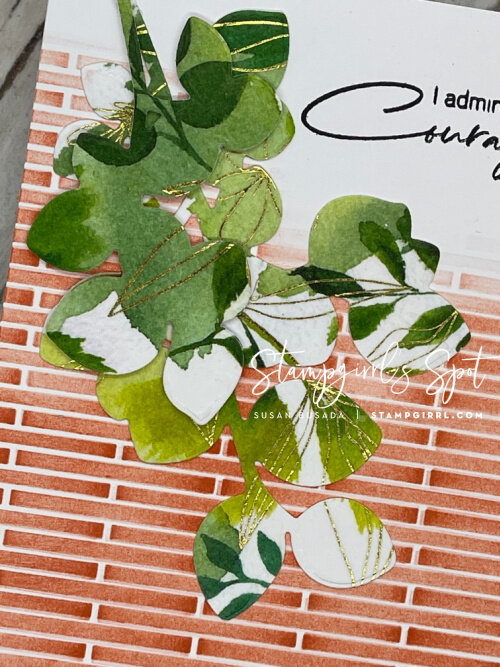
When I created the alcohol ink flowers for my altered item, I made more leaves that I needed. I set them aside for this card. The difficult part of this card was the layout of leaves. They needed to be evenly spaced so they filled the front of the card.

Once the leaves are initially laid out, then the trimmings can be used to fill in the other areas.
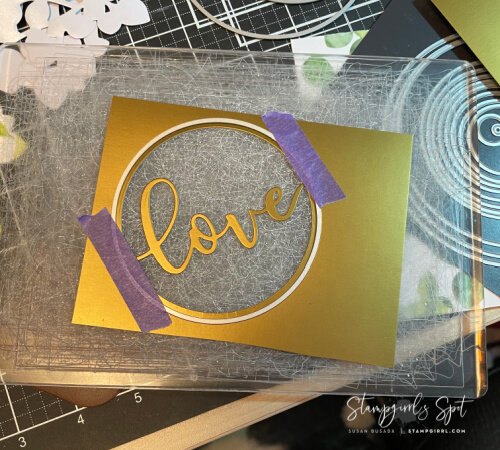
I decided to use gold cardstock and the Circled Greetings: Love die, but it didn’t stand out well enough from the background leaves. I used the leftover plain vellum and cut a circle a little larger than the gold circle to place behind it to set it apart a little.
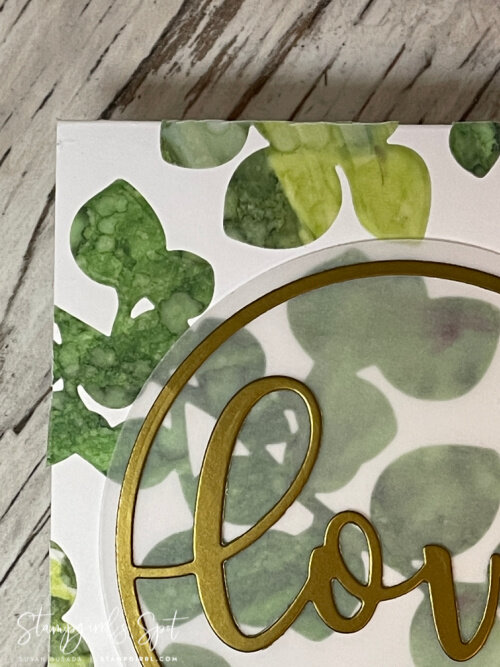
It’s a clean & simple card, but I loved the way it turned out. (Classes: Clean & Simple Boutique Cards, Let it Shine, Magic Marker Techniques)

The second card uses the Cool Summer Nights die ink cubes and matching thin Washi Tape.
I laid out the leaf arrangement on the card, then inked them in an ombre style, with the darkest color at the top, moving down to the lightest color at the end. I continued the ombre from one branch to the other, tying the two pieces together.
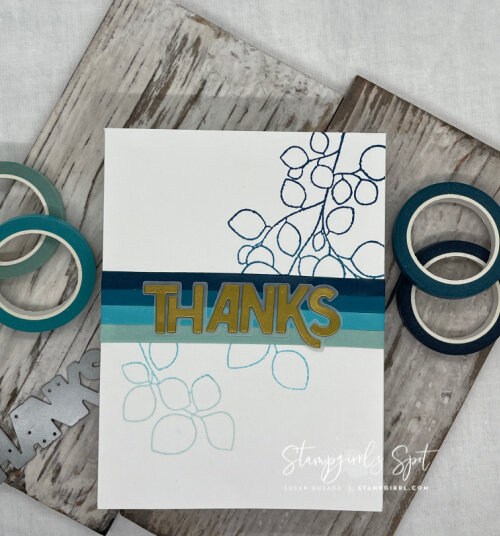
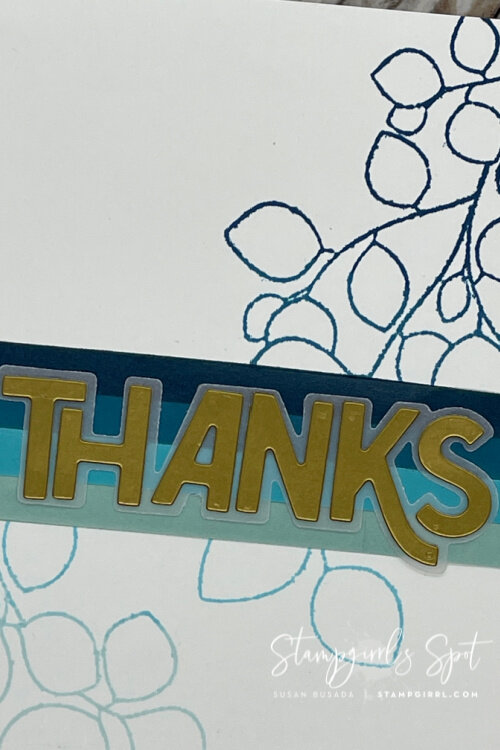
I used the washi tape to create ombre stripes at the center of the card, then used the Bold Thanks die for the greeting. Once again I used gold metallic paper for the word and vellum for the background. (Class: Polychromatic - monochrome)

This was, by far, my most challenging card. I had struggled with a masking technique for this card, and by struggled I mean until midnight. At 1am, I got the idea for this card, so this card was created while I was in my pajamas!
Using a piece of watercolor paper for the base, I inked the stamp with Caribbean Sky ink, then spritzed it with water and stamped it onto the watercolor paper. This is a great faux watercolor technique, and I love the look it gives! I let it dry overnight, stamped over the image with embossing ink, then embossed it with Crystal Clear Crisp embossing powder.
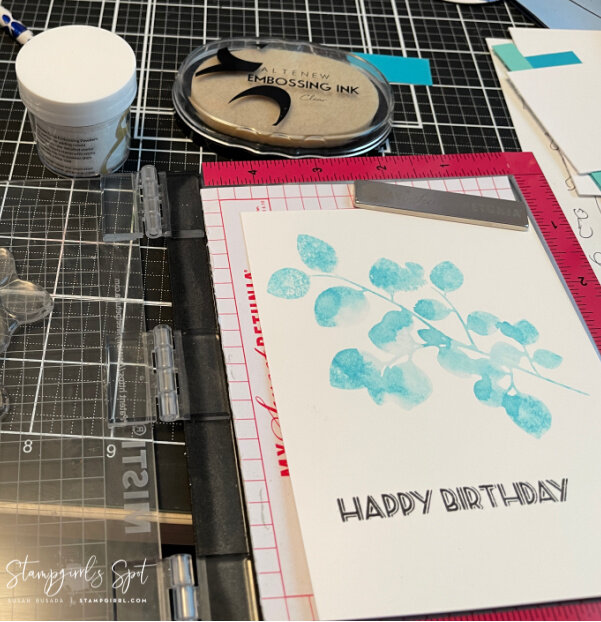
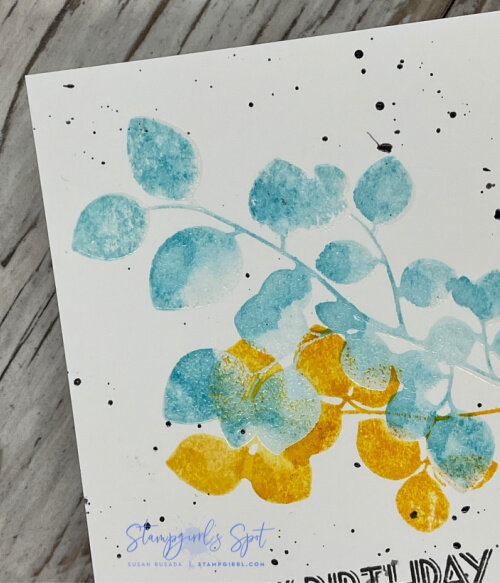
I love the look of blue and orange together, so I stamped the smaller branch slightly over the blue embossed branch. The orange doesn’t stick to the embossed areas. It’s a technique called “emboss resist” because the embossed area “resists” any color stamped over it. There is a bit of orange showing through some of the blue leaves, but I like how it made the blue leaves look a little translucent.
I used the Layered Cupcake stamp set for the greeting. I like that the greeting gives the card a bit of an edge. It looked a little plain, so I gave it some black splatter. (Classes: Masking Unleashed)

For my final card, I used the Narrow Brick stencil and the die from the Leaf Canopy set. Using Firebrick ink and the Large Ink Blending Tool, I added a stencil pattern to the card front. After trying this unsuccessfully a few times, I realized the cleanest way to do this is to add the color in a sideways motion - swiping from side to side - instead of the circular way I’d normally do it, I left some space in the top right corner for my sentiment. I used one of the ones included in the Tall Foliage stamp set. I really like the fonts - they’re a nice combination of cursive and block letters.

For the ivy hanging off of the wall, I placed Misty Meadows Wide Washi tape to cardstock, then ran it through the Mini Blossom Die Cutting machine with the Leaf Canopy die. I like how the little bit of gold that catches the light. Once I figured out the secret to getting clean lines on the stencil, the rest of the card came together quickly. (Class: Beyond Basic Backgrounds, Let it Shine)

I purchased brown boxes to use for packaging my card set, however the boxes were too big, so I had to go with Plan B. I stacked the envelopes on top of the cards, so there would be a plain background, then wrapped everything in a strip of acetate, and attached one of the die cut leaf branches. Not the grand plan I had in mind, but it’s clean and simple and definitely my style.
To all of you who have lasted to the very end, thank you!
Until next time, Take care and be kind,
Xo
Sue